Harderning Server with Fail2ban and Reporting to Telegram
After being busy enough that I didn’t have time to create challenges and write down how to complete these challenges on this blog, this time we will discuss a little about fail2ban and how to configure it.
Generally fail2ban is used to ban IPs that fail to authenticate up to the maximum limit stated in the configuration and this IPS is very effective in preventing attacks that will occur on the server, such as bruteforce attacks on SSH ports (22), FTP (21), SMTP (25), etc., even other attacks via the web server (80/443), then before knowing how to configure fail2ban, we will learn a little about how fail2ban works.
On its website (https://www.fail2ban.org) it is stated that fail2ban scans log files (such as /var/log/apache/access.log) and bans IPs that carry out odd activities such as repeated logins in a short time (bruteforce), password errors, and other exploitative activities. Fail2ban generally uses a firewall (iptables) to update firewall rules (ban).
So fail2ban is quite complex, it scans the log files mentioned, records any activity that is considered odd, then enters the IP that did this into the database and when the IP exceeds the maximum allowable limit then the IP is banned.
If we feel we understand the complicated explanation above, we will configure fail2ban for the Zimbra mail server.
- Install fail2ban
# ubuntu
sudo apt install fail2ban

# centos
yum update
yum install epel-release
yum install fail2ban
- Backup the default configuration
cp /etc/fail2ban/jail.conf /etc/fail2ban/jail.conf.backup
- Create new filter for Zimbra
vim /etc/fail2ban/filter.d/zimbra.conf
add the filter configuration as below:
[Definition]
failregex = \[ip=<HOST>;\] account - authentication failed for .* \(no such account\)$
                        \[ip=<HOST>;\] security - cmd=Auth; .* error=authentication failed for .*, invalid password;$
                        ;oip=<HOST>;.* security - cmd=Auth; .* protocol=soap; error=authentication failed for .* invalid password;$
                        \[oip=<HOST>;.* SoapEngine - handler exception: authentication failed for .*, account not found$
                        WARN .*;ip=<HOST>;ua=ZimbraWebClient .* security - cmd=AdminAuth; .* error=authentication failed for .*;$
                        NOQUEUE: reject: RCPT from .*\[<HOST>\]: 550 5.1.1 .*: Recipient address rejected:

ignoreregex =
- Change filter postfix auth
# vim /etc/fail2ban/filter.d/postfix-auth.conf
[Definition]
failregex = lost connection after AUTH from (.*)\[<HOST>\]
            lost connection after EHLO from (.*)\[<HOST>\]
ignoreregex =
- Edit the configuration of jail.conf as below:
# vim /etc/fail2ban/jail.conf

# Fail2Ban configuration file
# whitelisted IP
ignoreip = 127.0.0.1/8, 10.10.10.666

# "bantime" is the number of seconds that a host is banned, -1 mean permanent ban
bantime = -1

# "maxretry" is the number of failures before a host get banned.
maxretry = 2

# A host is banned if it has generated "maxretry" during the last "findtime"
# seconds.
findtime = 1800

# "backend" specifies the backend used to get files modification. Available
# options are "gamin", "polling" and "auto". This option can be overridden in# each jail too (use "gamin" for a jail and "polling" for another).
#
# gamin: requires Gamin (a file alteration monitor) to be installed. If Gamin
# is not installed, Fail2ban will use polling.
# polling: uses a polling algorithm which does not require external libraries.
# auto: will choose Gamin if available and polling otherwise.
backend = auto

# used protocol, tcp, udp or all
protocol = all

# configuration for zimbra account
[zimbra-account]
enabled = true
filter = zimbra
#####
# explanation
# action will take when IP trigger the configuration
# iptables-allports -> ban IP with iptable
# telegram -> send notification to telegram bot (need more configuration, see instruction below)
# sendmail -> send notification to e-mail (need more configuration, see instruction below)
# if action no needed / not yet configured, please just remobe it
#####
action = iptables-allports[name=zimbra-account]
        sendmail[name=zimbra-account, dest=[email protected];[email protected]]
        telegram

# log path that will searched for generated regex
logpath = /opt/zimbra/log/mailbox.log

[zimbra-audit]
enabled = true
filter = zimbra
action = iptables-allports[name=zimbra-audit]
        telegram
logpath = /opt/zimbra/log/audit.log

[zimbra-recipient]
enabled = true
filter = zimbra
action = iptables-allports[name=zimbra-recipient]
        telegram
logpath = /var/log/zimbra.log
findtime = 604800
maxretry = 3

[postfix]
enabled = true
filter = postfix
action = iptables-allports[name=postfix]
        telegram
logpath = /var/log/zimbra.log

[postfix-auth]
enabled = true
filter = postfix.auth
action = iptables-allports[name=postfix-auth]
        telegram
logpath     = /var/log/mail.log
- Start the fail2ban service
# activate fail2ban
systemctl start fail2ban

# set fail2ban autostart while reboot
systemctl enable fail2ban
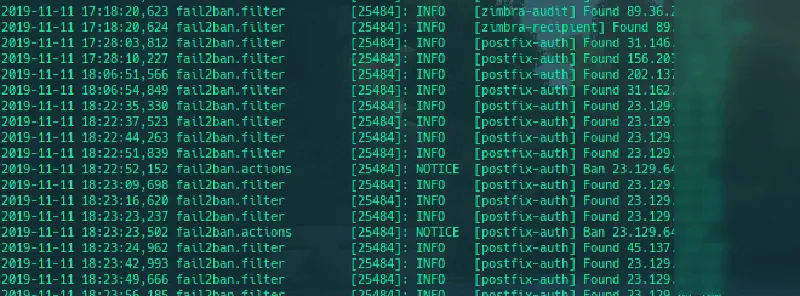
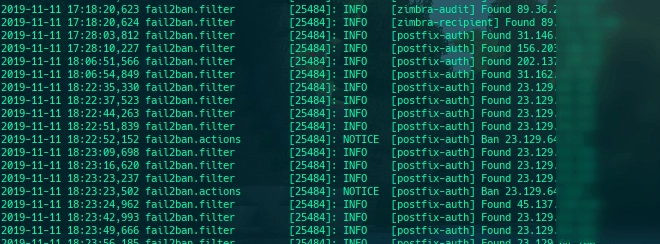
In the filter.d folder we create a new regex where when the regex is found fail2ban will trigger and store the IP of the client that triggered the trigger in the database
In the filter.d/zimbra.conf configuration file we create a regex where when the user fails to log in the IP will be saved in the database
In the filter.d/postfix-auth.conf configuration file we create a regex which aims when the user breaks the connection when AUTH / EHLO then the IP will be saved, I did this because the Zimbra server is often attacked using EHLO flood
The main configuration of fail2ban is in the jail.conf file, and there is a quite unique action, namely Telegram, this action is custom, because sending notifications via e-mail in my opinion is not real time because I myself rarely open my mail inbox.
If you want ot use email for noitification you can edit the /etc/fail2ban/action.d/sendmail.conf file
# from
Fail2Ban” | /usr/sbin/sendmail -f <sender> <dest>
# to
Fail2Ban" | /opt/zimbra/postfix/sbin/sendmail -f <sender> <dest>
But if you want to use Telegram for the notification you can create or edit the /etc/fail2ban/action.d/telegram.conf file as below:
# Fail2Ban configuration file
# Author: MushaGH

[Definition]
# Option:  actionstart
# Notes.:  command executed once at the start of Fail2Ban.
# Values:  CMD
actionstart = /etc/fail2ban/scripts/fail2ban-telegram.sh start

# Option:  actionstop
# Notes.:  command executed once at the end of Fail2Ban
# Values:  CMD
actionstop = /etc/fail2ban/scripts/fail2ban-telegram.sh stop

# Option:  actioncheck
# Notes.:  command executed once before each actionban command
# Values:  CMD
actioncheck =

# Option:  actionban
# Notes.:  command executed when banning an IP. Take care that the
#          command is executed with Fail2Ban user rights.
# Tags:    See jail.conf(5) man page
# Values:  CMD
actionban = /etc/fail2ban/scripts/fail2ban-telegram.sh ban <ip>

# Option:  actionunban
# Notes.:  command executed when unbanning an IP. Take care that the
#          command is executed with Fail2Ban user rights.
# Tags:    See jail.conf(5) man page
# Values:  CMD
actionunban = /etc/fail2ban/scripts/fail2ban-telegram.sh unband <ip>

[Init]
init = 123
and create fail2ban-telegram script in /etc/fail2ban/scripts/fail2ban-telegram.sh as below:
#!/bin/bash

# Sends text messages using Telegram
# to alert webmaster of banning.

# Require one argument, one of the following
# start
# stop
# ban
# unban
# Optional second argument: Ip for ban/unband


# Display usage information
function show_usage {
  echo "Usage: $0 action <ip>"
  echo "Where action start, stop, ban, unban"
  echo "and IP is optional passed to ban, unban"
  exit
}

# Send notification
function send_msg {
  apiToken=<YOUR_TELEGRAM_BOT_TOKEN_ID>
  chatId=<YOUR_CHAT_ID>
  url="https://api.telegram.org/bot$apiToken/sendMessage"
  curl -s -X POST $url -d chat_id=$chatId -d text="$1"
  exit
}

# Check for script arguments
if [ $# -lt 1 ]
then
  show_usage
fi

# Take action depending on argument
if [ "$1" = 'start' ]
then
  msg='Fail2ban+just+started.'
  send_msg $msg
elif [ "$1" = 'stop' ]
then
  msg='Fail2ban+just+stoped.'
  send_msg $msg
elif [ "$1" = 'ban' ]
then  msg=$([ "$2" != '' ] && echo "Fail2ban+just+banned+$2" || echo 'Fail2ban+just+banned+an+ip.' )
  send_msg $msg
elif [ "$1" = 'unban' ]
then
  msg=$([ "$2" != '' ] && echo "Fail2ban+just+unbanned+$2" || echo "Fail2ban+just+unbanned+an+ip." )
  send_msg $msg
else
  show_usage
fi
by default fail2ban will ban using iptables with param block with icmp unreachable, because it felt less strict I changed it to drop, this can be done by opening the file /etc/fail2ban/action.d/iptables-common.conf and changing the line
# dari
blocktype = REJECT --reject-with icmp-port-unreachable

# menjadi
blocktype = DROP
For Wordpress application we can add new filter to block bruteforce attacks with this regex or filter
failregex = ^<HOST>.*].*/xmlrpc\.php.*
# dan atau
failregex = ^<HOST>.*].*POST.*/wp-login\.php HTTP.*
Then adjust the file configuration in jail.conf
Not only that, actually it can still be processed more deeply regarding fail2ban which is integrated with this Telegram bot, namely making the bot more interactive using the bot menu such as displaying the total of 1 banned, listing all banned IP addresses, unbanning banned IPs and can be creative according to each individual’s imagination.
Hopefully this article is useful, I’m waiting for your fail2ban bot :3
Catch you later.